Boudoir Beauty DIY: Unleash Your Inner Vixen with a Smokey Eye – A Beginner’s Makeup Tutorial
Boudoir Beauty DIY: Unleash Your Inner Vixen with a Smokey Eye – A Beginner’s Makeup Tutorial
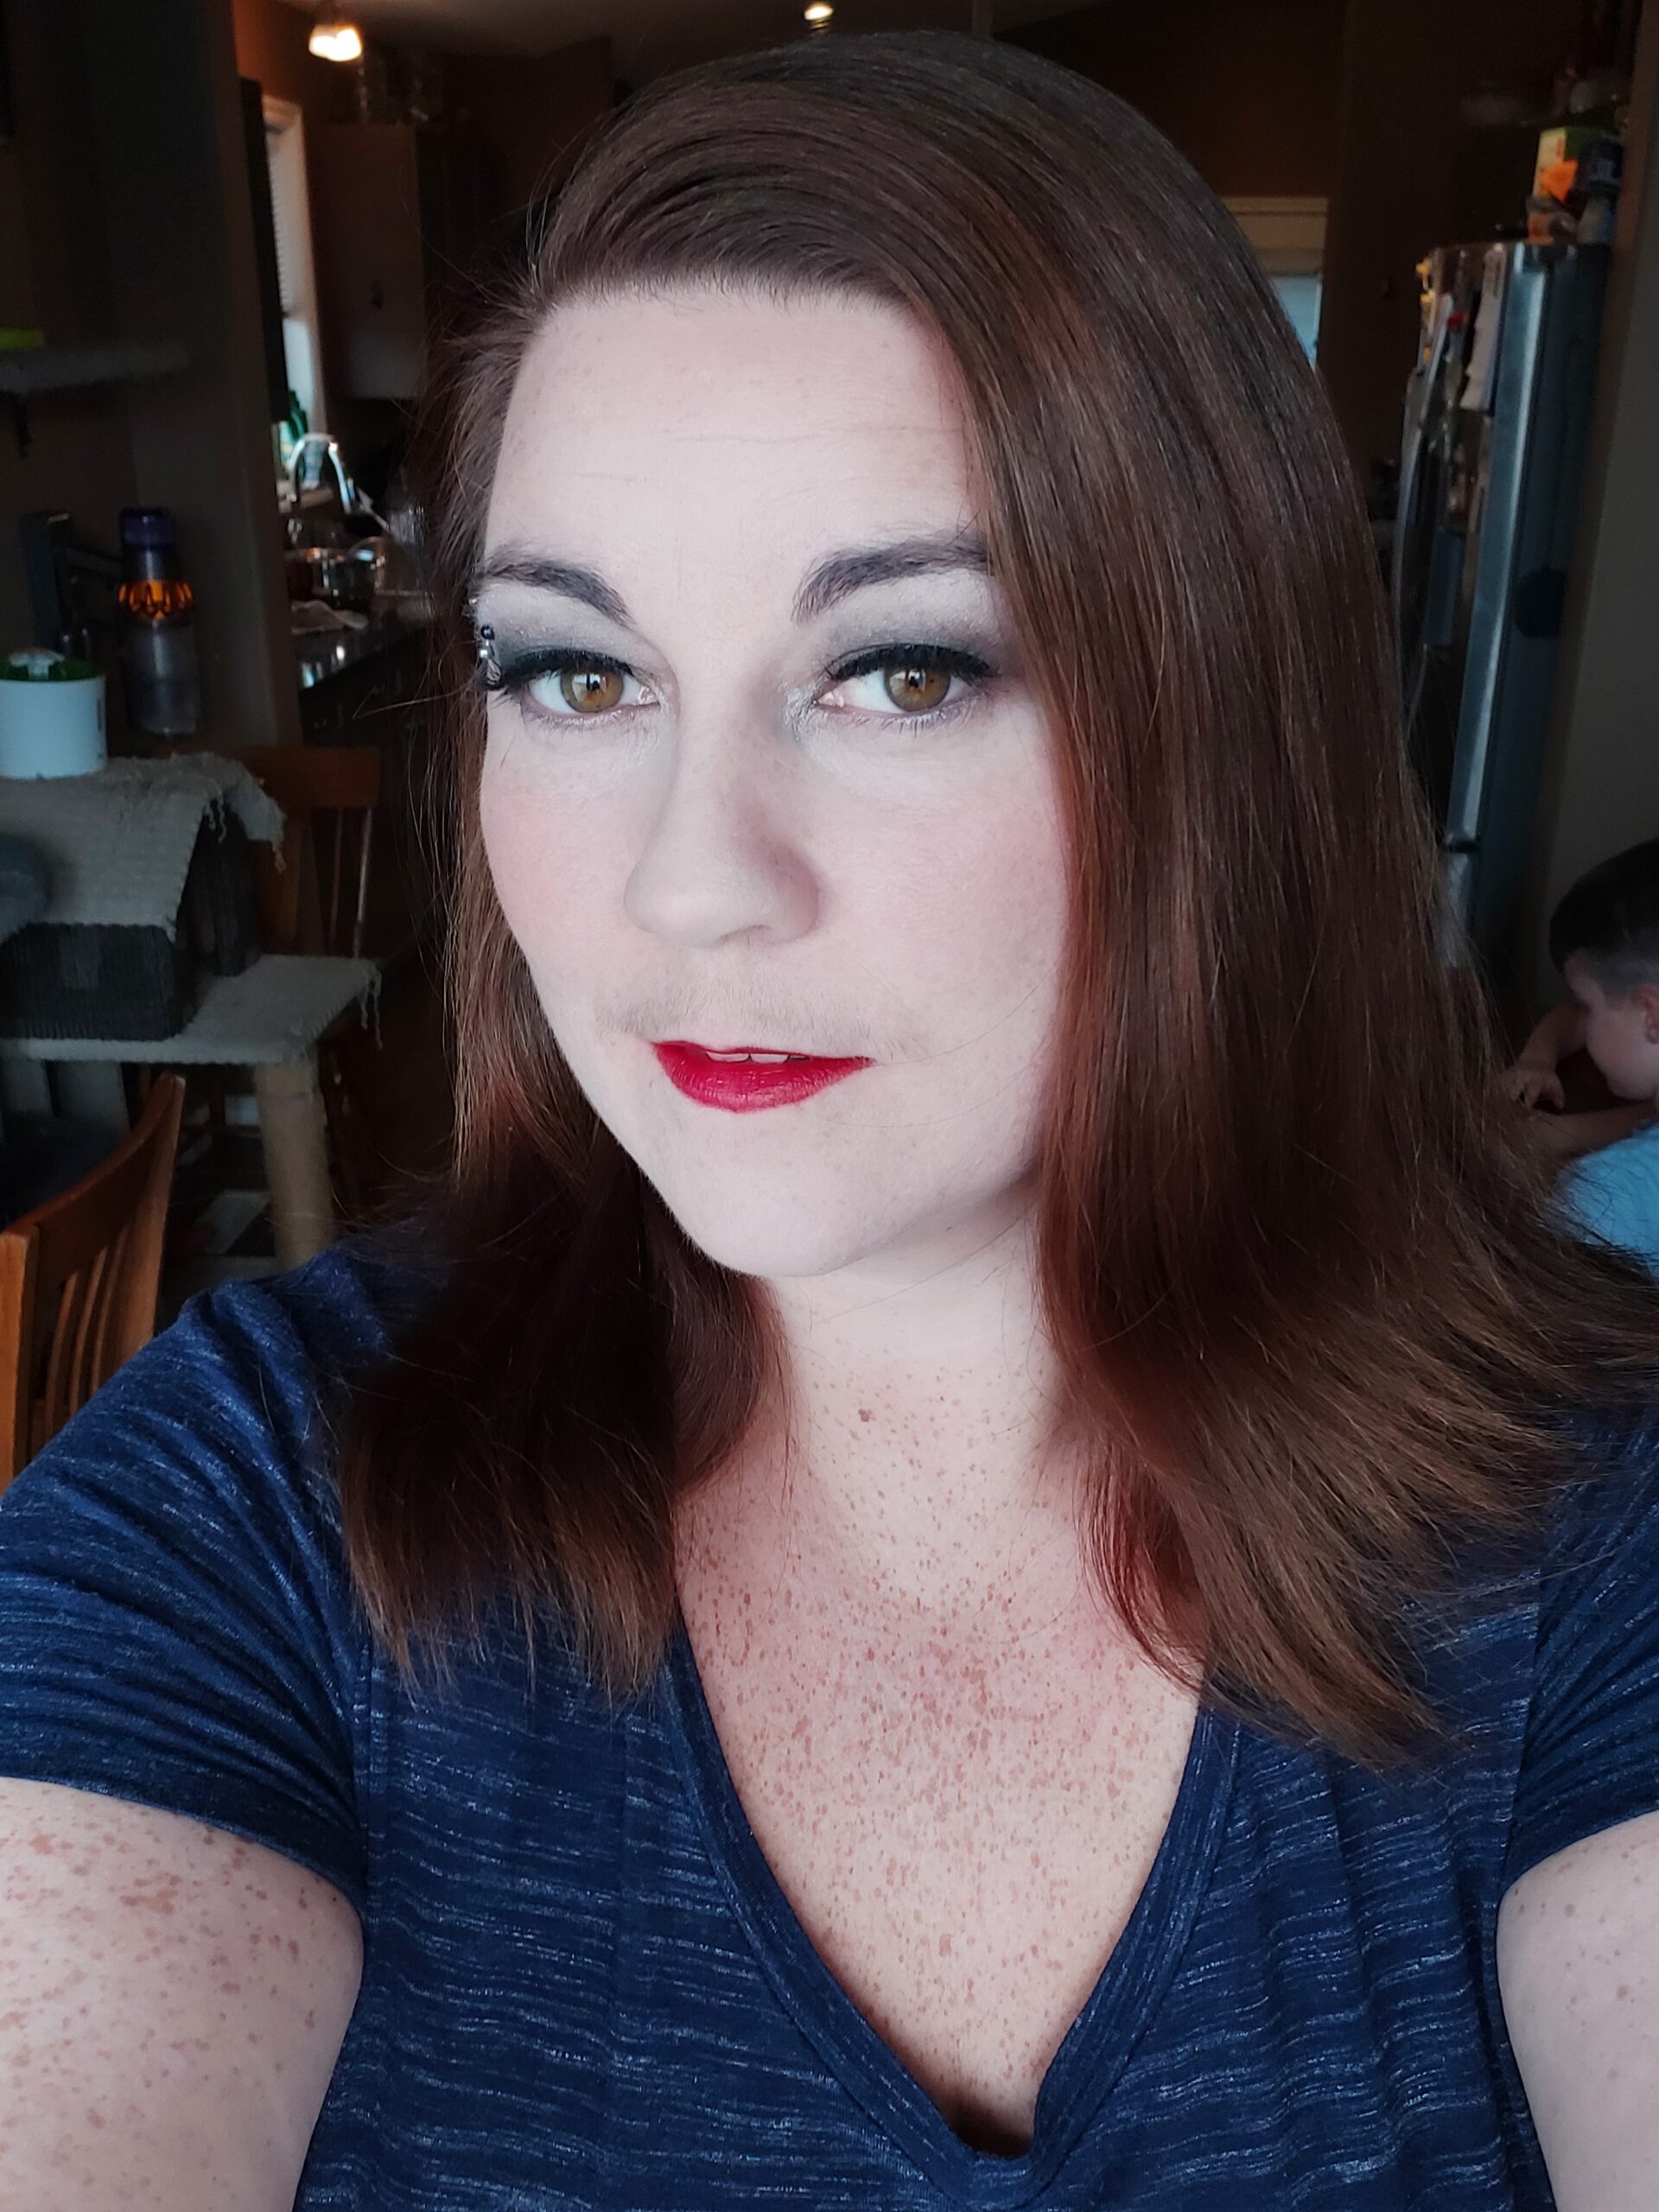
Embark on the journey of self-expression with this exclusive collaboration featuring Nathalie Crosby from BLNDE Beauty Bar by Revamp. In this tutorial, designed specifically for beginners or those with a touch of makeup experience, we unveil the secrets to applying a sultry smokey eye for your boudoir shoot. Whether you’re exploring DIY options due to budget constraints or facing challenges aligning with a makeup artist’s schedule, this tutorial will empower you to effortlessly capture your inner allure.
If you’re wondering why you should have your makeup done for your boudoir shoot, I have a blog post that will explain why: Hair and Makeup For Your Boudoir Shoot: Do You Need It?
But, the short answer is this: Makeup helps accentuate your features. You’re not changing who you are, you’re simply bringing forward and embracing the parts you love the most. So don’t skip out on makeup for your boudoir shoot.
Alright! Lets go!
I’m going to go through the written step-by-step first and you can find the tutorial videos at the bottom. There are two – one for warm eye and one for cool eye. If you want to skip over all the written and go straight to the Video, just click here: JUMP TO VIDEOS
Boudoir Beauty DIY: Unleash Your Inner Vixen with a Smokey Eye – A Beginner’s Makeup Tutorial
What You’ll Need (And What Was Helpful)
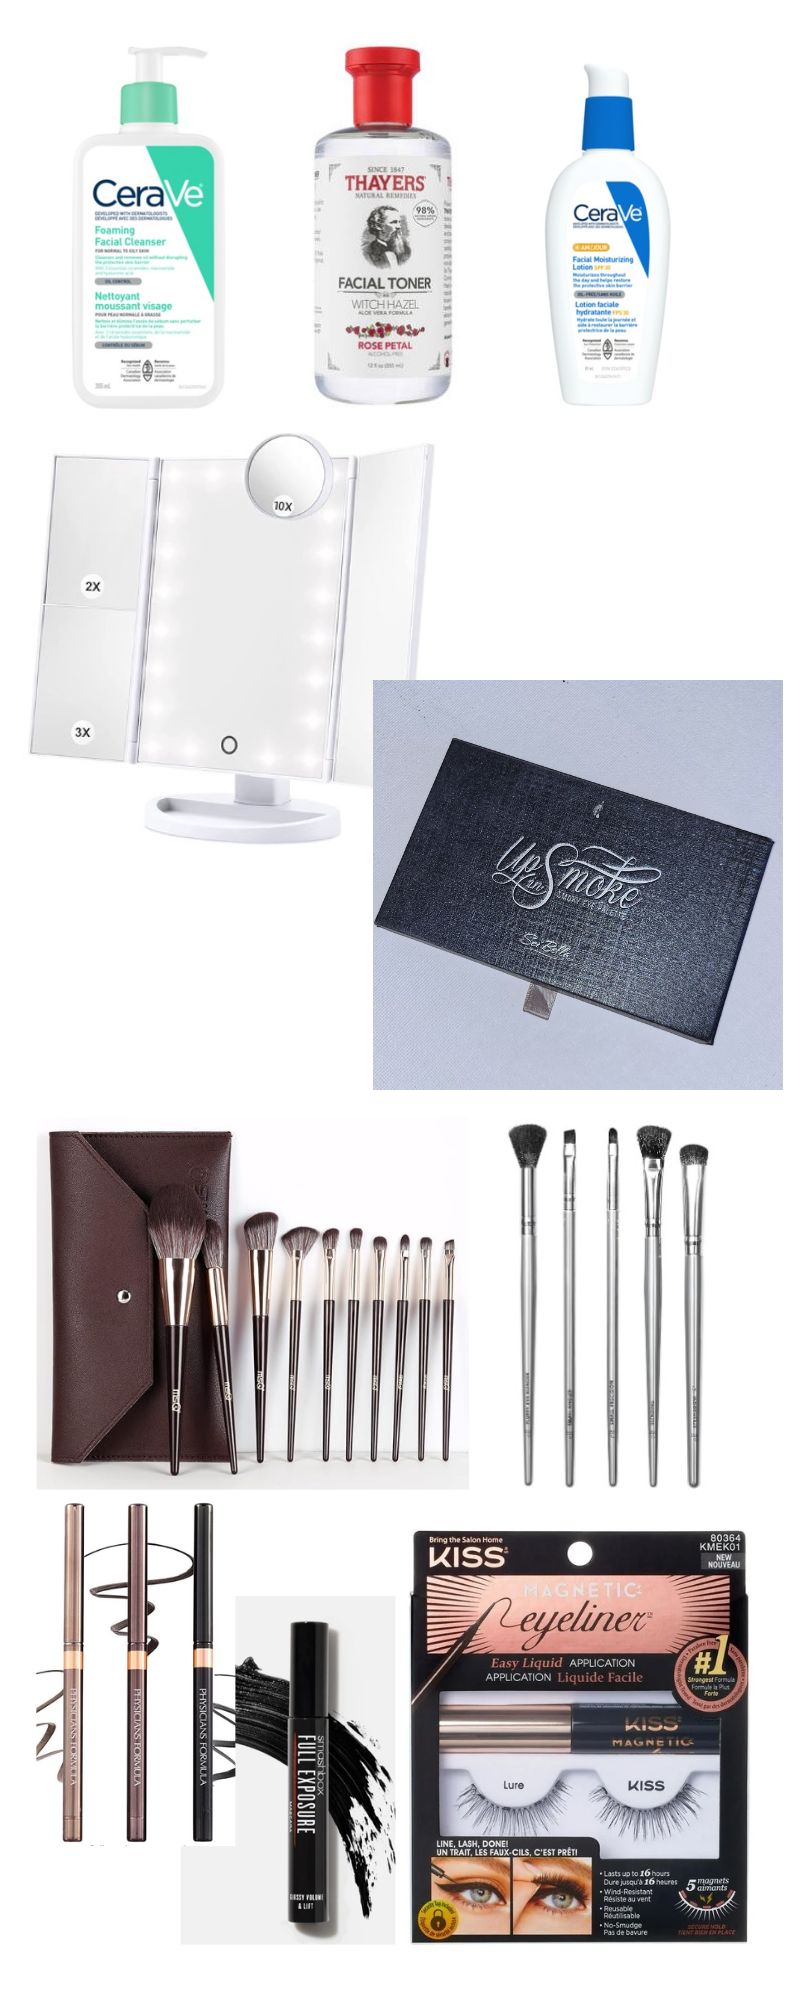
1) Whatever you need to wash and moisturise your face
Here’s what I used: CeraVe Normal to Oily Foaming Cleanser, Thayers Witch Hazel Facial Toner, CeraVe Daytime Moisturiser
CeraVe also has a Normal To Dry Foaming Cleanser.
2) Makeup Brushes
I used two sets: MSQ 10 Piece Brush Set in Brown and the ELF Smokey Eye Brush Kit
3) Eyeshadow Palette
I used the Sei Bella Up In Smoke palette which was purchased through Melaluca. They don’t seem to have the one I use anymore, but they have others, so go check out their website: Melaleuca Sei Bella Beauty
An alternative palette that you could consider is this Maybelline New York Nudes palette available on Amazon
4) Eyeliner
I used Physicians Formula Eyeliner Trio (Nude eye).
5) Mascara
I used SmashBox Full Exposure but here is a cheaper alternative: L’Oreal Paris Telescopic Mascara.
6) False Lashes
I highly recommend magnetic eyelashes for the ease of use but the eyeliner used only comes in black so I only used them for the cool look: KISS Magnetic Lashes and Lash Kit
7) Eyelash Curler
You can get an eyelash curler at any pharmacy.
8) Makeup Mirror
Definitely worth the purchase to ensure my face was evenly lit. My prior attempt to do this tutorial in my bathroom ended up with makeup that was incredibly heavy so good lighting is crucial to beautiful makeup.
This is the mirror I used: Dencert Trifold Makeup Mirror
*Disclaimer: all of the product links I’ve provided will provide me with a commission if you purchase using those links*
1) Prep Your Skin/Cleanse, Tone and Moisturize
Start by following the directions on your chosen products.
Here’s my quick version: I splashed my face, worked the cleanser in with some circular finger magic, then wiped it away with a fresh, damp cloth. Pat, pat, pat—dry face achieved!
Next up, a toner party on my face using a cotton pad (or your trusty hands if pads are MIA).
Finally, a little self-love massage with moisturizer, using tiny circular motions for that extra spa-like feel.
Voila, you’re ready to paint that gorgeous mug!
2) Set Yourself Up For Success
Before you embark on the beauty journey, gather your glam squad—mirror, brushes, palette, and those handy makeup wipes for any artistic mishaps. Keep everything close; you wouldn’t want to disrupt the magic with unnecessary trips. Clip that hair back, maybe toss on a headband, and consider doing makeup before hair—trust me, it’s the secret to keeping those locks camera-ready without any styling casualties!
3) Eyes That Wow: Eyeshadow
i) Base Brilliance
Start with a mid-tone color – not too dark and not too light! Use a larger brush for sweeping motions over the eyelid and slightly above the crease. Transition to circular motions for that flawless blend.
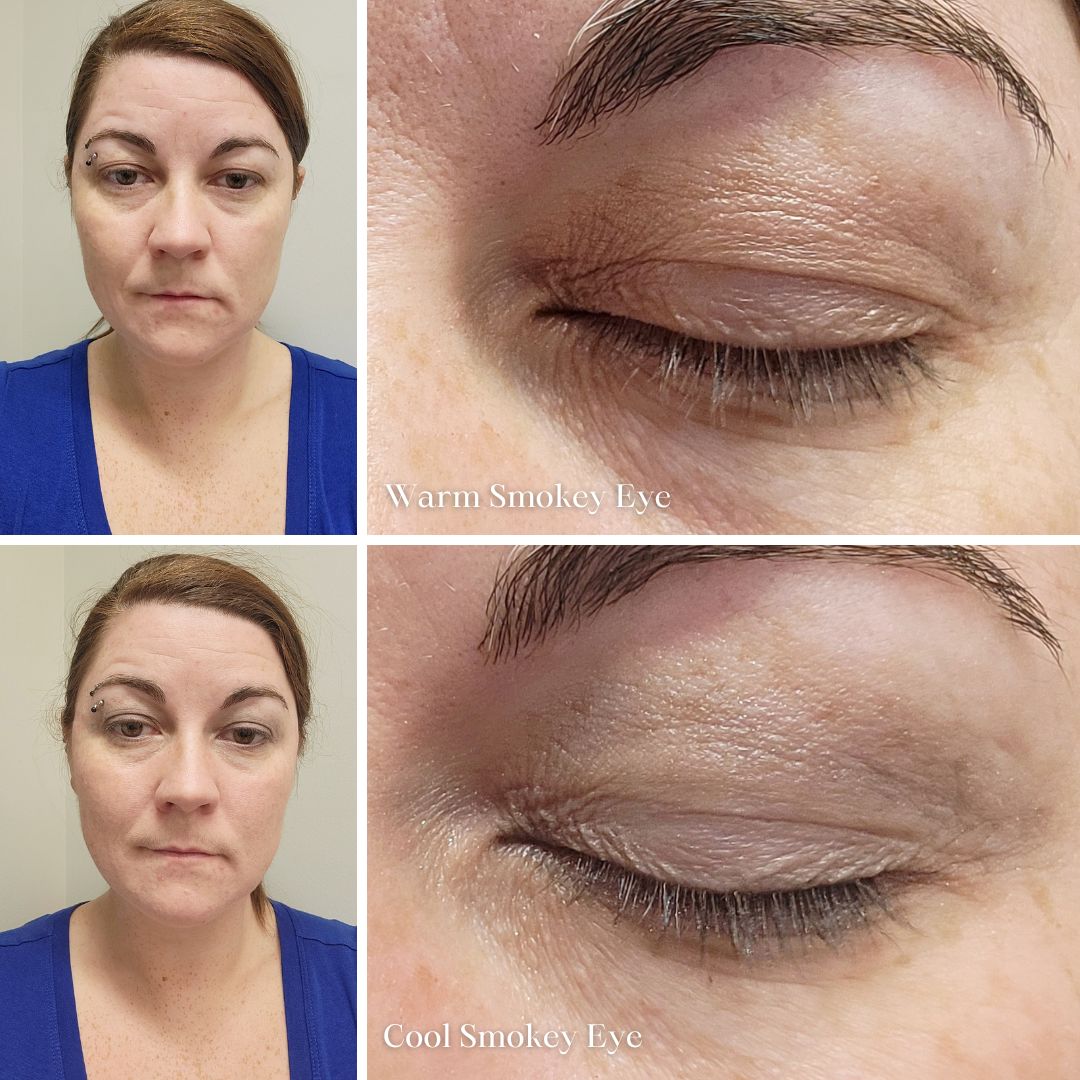
ii) Crease Charm
Lighter vibes ahead! Opt for a shade lighter than your base color. Same brush (wipe it clean if needed by brushing it on your arm; you can wipe it off later), sweeping motions in the crease and to the outside corner of your eye, and blend with those small circular motions for a seamless transition.
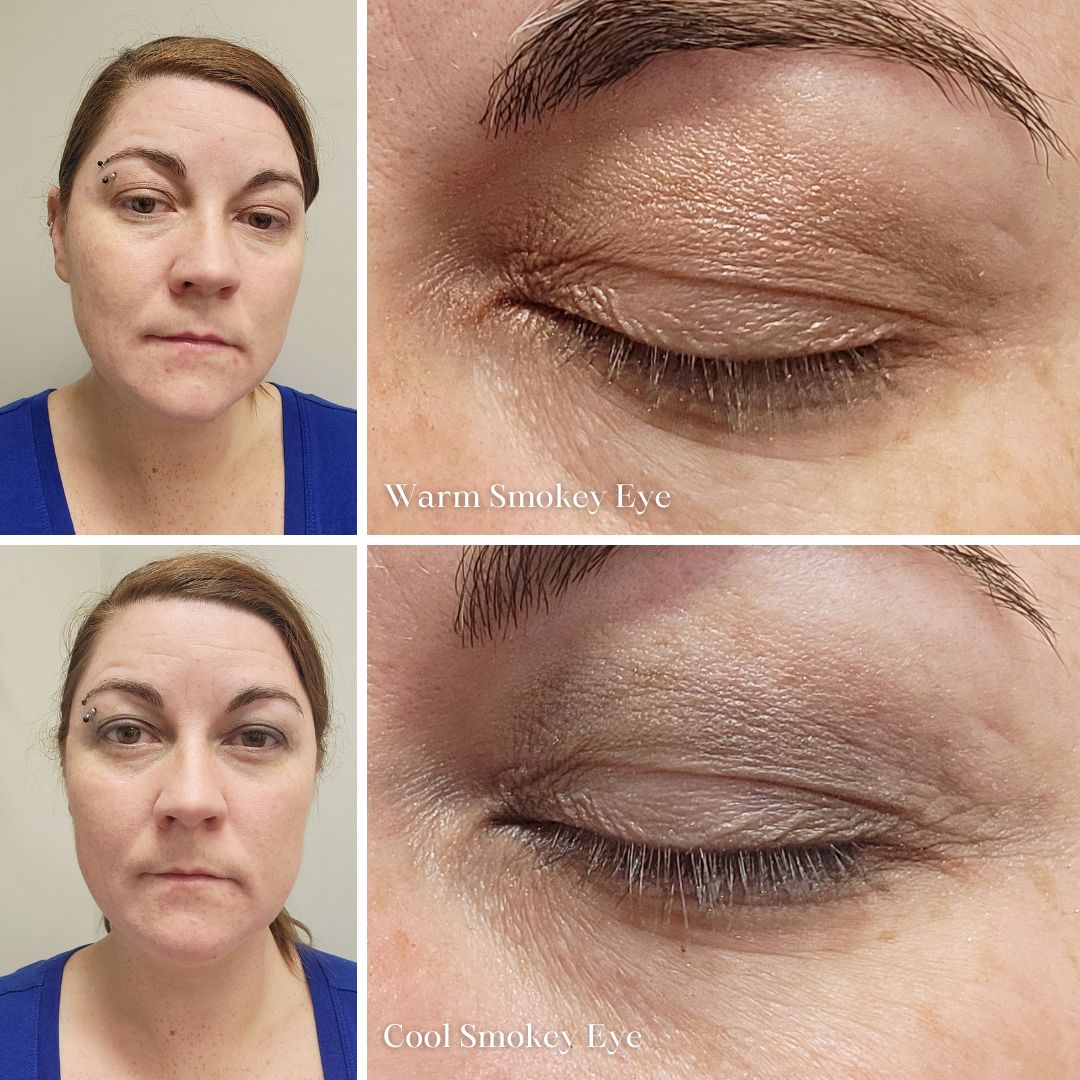
iii) Dark Drama
Time for intensity! Choose the darkest color on your palette. Employ a smaller brush for precision. Press the color into the eyelid – not sweeping, press – forming a ‘c’ shape from the crease down to the lash line just on the outside corner. Don’t worry about perfection—this is just the beginning.
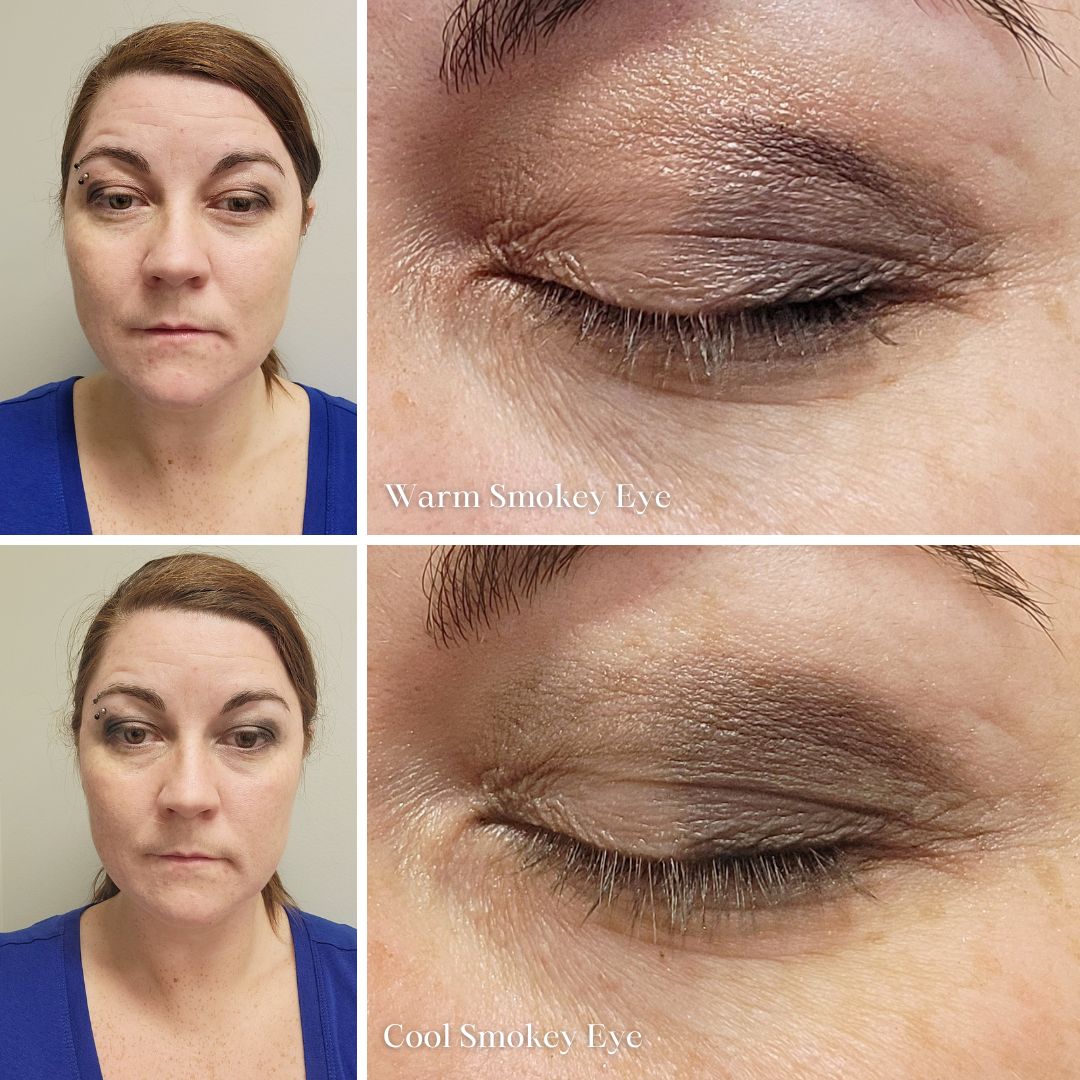
iv) Blend Wizardy
Grab the trusty big brush. Dust a touch of nude shade and blend away the hard edges of the dark ‘c’. Sweep it gently across the upper lash line for that subtle eyeliner effect.
Pro tip: If the dark lightens, feel free to reapply and blend again.
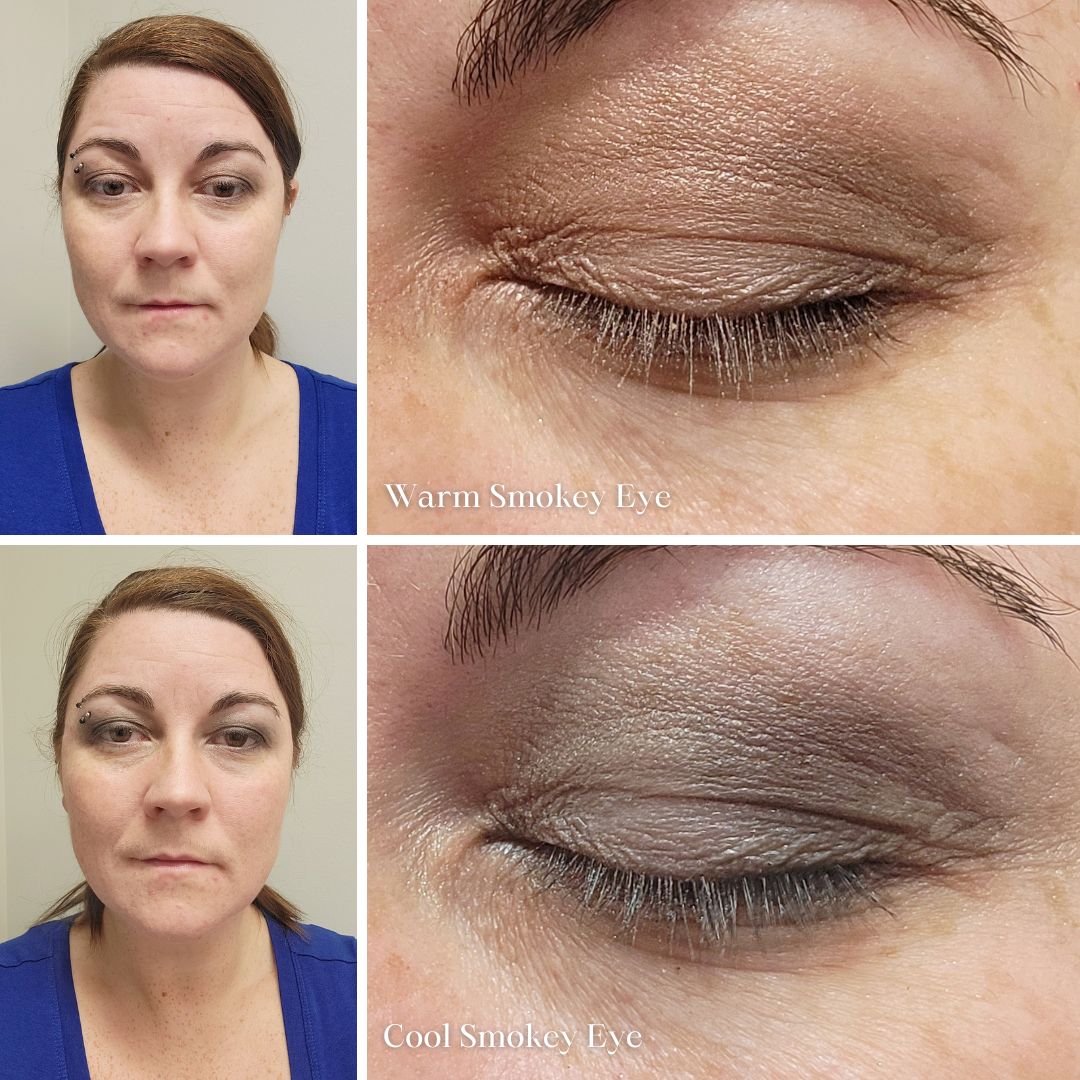
v) Sparkle Fiesta Lid Luminscense (Optional)
Ready for some glam? Press some sparkle on the inner eyelid using a smaller fluffy brush. Wiggle it around in the makeup to pick up that sparkle. Start by pressing the brush into the eyelid to create a base from the inside corner of the eye to where it meets your dark ‘c’ shape. Use sweeping motions to bring it up into the crease. To blend where the dark ‘c’ meets the sparkle, use a different but similar color of shimmery eyeshadow with a small brush, zig-zagging across the line where the sparkle and darkness meet.
If you aren’t using sparkle, or you don’t have any (as I didn’t), you can do as I did and use a lighter color applied to the same area to highlight that same spot and zig zag blend it in with the dark.
vi) Very Light Blend
Final touches! A very light blend with the nude using the big fluffy brush. You’re almost there!
vii) Corner Pop
Brighten it up! Use a small brush and a lighter color on your palette. Press it into the inside corner of your eye, then add a small circular motion. Feeling extra? Sweep that light color across your lower lash line.
This is a step that can be redone after your foundation/concealer/etc as you may ‘erase’ some of it with the concealer.
Pro Tip Alert: Less is More!
Here’s the key to success: Begin with a modest amount of product, and if needed, build up the drama. It’s a breeze to add more, but a bit tricky to dial it back without a reset. Before each stroke, tap off excess product from your brush—it’s your secret weapon against uneven application. Master this, and you’re on your way to flawless perfection! 💄✨
4) Eyeliner Elegance: Define and Refine
Perfecting your eyeliner game is an art! If your eyeshadow hasn’t delivered that eyeliner-esque pop, fear not. Grab a trusty liquid eyeliner or pencil for a customized touch.
For a sultry pencil look, I opted for Physician Formula eyeliner pencils. Stretching my eyelid gently, I applied strokes along the lash line, ensuring it nestled into the lashes. A firm brush came into play, smudging for that soft, no-harsh-lines finish.
Now, for the cool vibe, I went magnetic! Using a liquid black magnetic eyeliner, I faced a no-smudge challenge. Enter Physician Formula’s black eyeliner for a smudge-friendly base. A touch of smudging, then the grand finale—the KISS kit’s liquid eyeliner. Pull that eyelid, aim for a straight line, go light along the lash line, and make it a tad thicker for lash magic. Trust me, a thicker line ensures those magnetic lashes play nice! 🌟✨
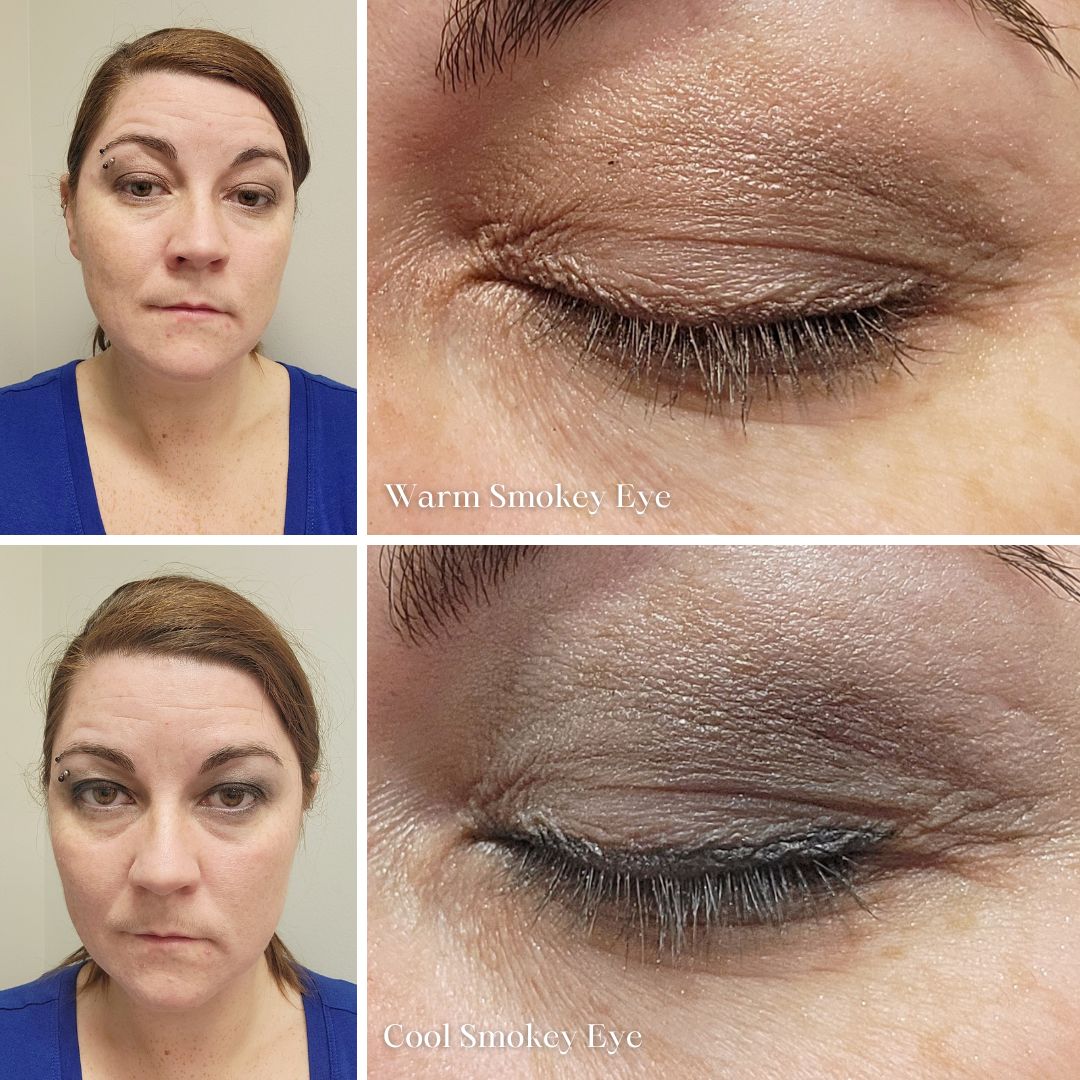
5) Luscious Lashes: Mascara Magic & False Lash Finesse
If falsies aren’t in your arsenal, fear not! Amp up those natural lashes with layers of mascara. Grab an eyelash curler for that eye-framing boost. Apply the mascara brush at the lash base, gently roll it up and out. Blinking helps pull the brush through. Let it dry, then repeat. Dabble a bit on the lower lash line, but proceed with caution—no pressing too hard to avoid mascara-on-skin mishaps!
Quick Fix Tip: If mascara accidentally taps your eyeshadow, grab more eyeshadow to blend and camouflage. Works like a charm with darker hues, but tread lightly with lighter shades.
Magnetic lashes are a breeze. Already flaunting magnetic eyeliner? Position the lashes, let the magnets work their magic, and if they misbehave, just remove and readjust. Easy peasy.
If opting for glue-on lashes (which I personally don’t use), they demand practice but are reusable.
For magnetic lashes, once in place, use an eyelash curler to bring natural and false lashes together seamlessly. A little press goes a long way. I also press them together gently with my fingers if the curler isn’t doing the trick.
Now, flutter those lashes with confidence! 👁️✨
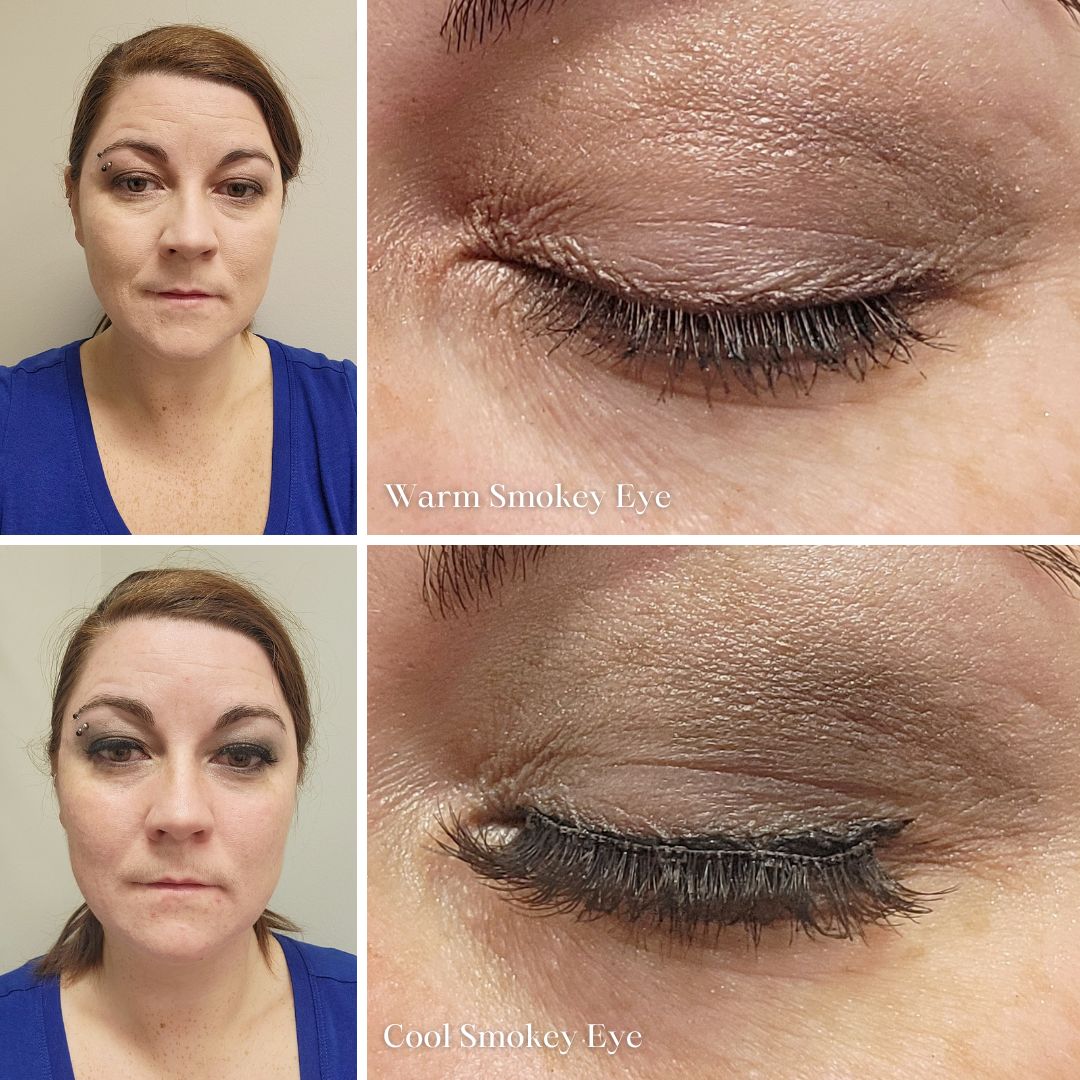
Your Eyes Are Ready to Shine!
Congratulations, your eyes are now a work of art! Ensure a seamless transition—no harsh lines except for possibly that eyeliner edge.
Ready to conquer the full glam look? Stay tuned for the next makeup tutorial installment on concealer, foundation, blush, and beyond where I’ll spill the secrets on achieving that cover up base. I’ve got you covered – well, your makeup does lol. I’ll link it here once it’s ready for your beauty journey! 💖🌟
Tutorial Videos
Final Thoughts
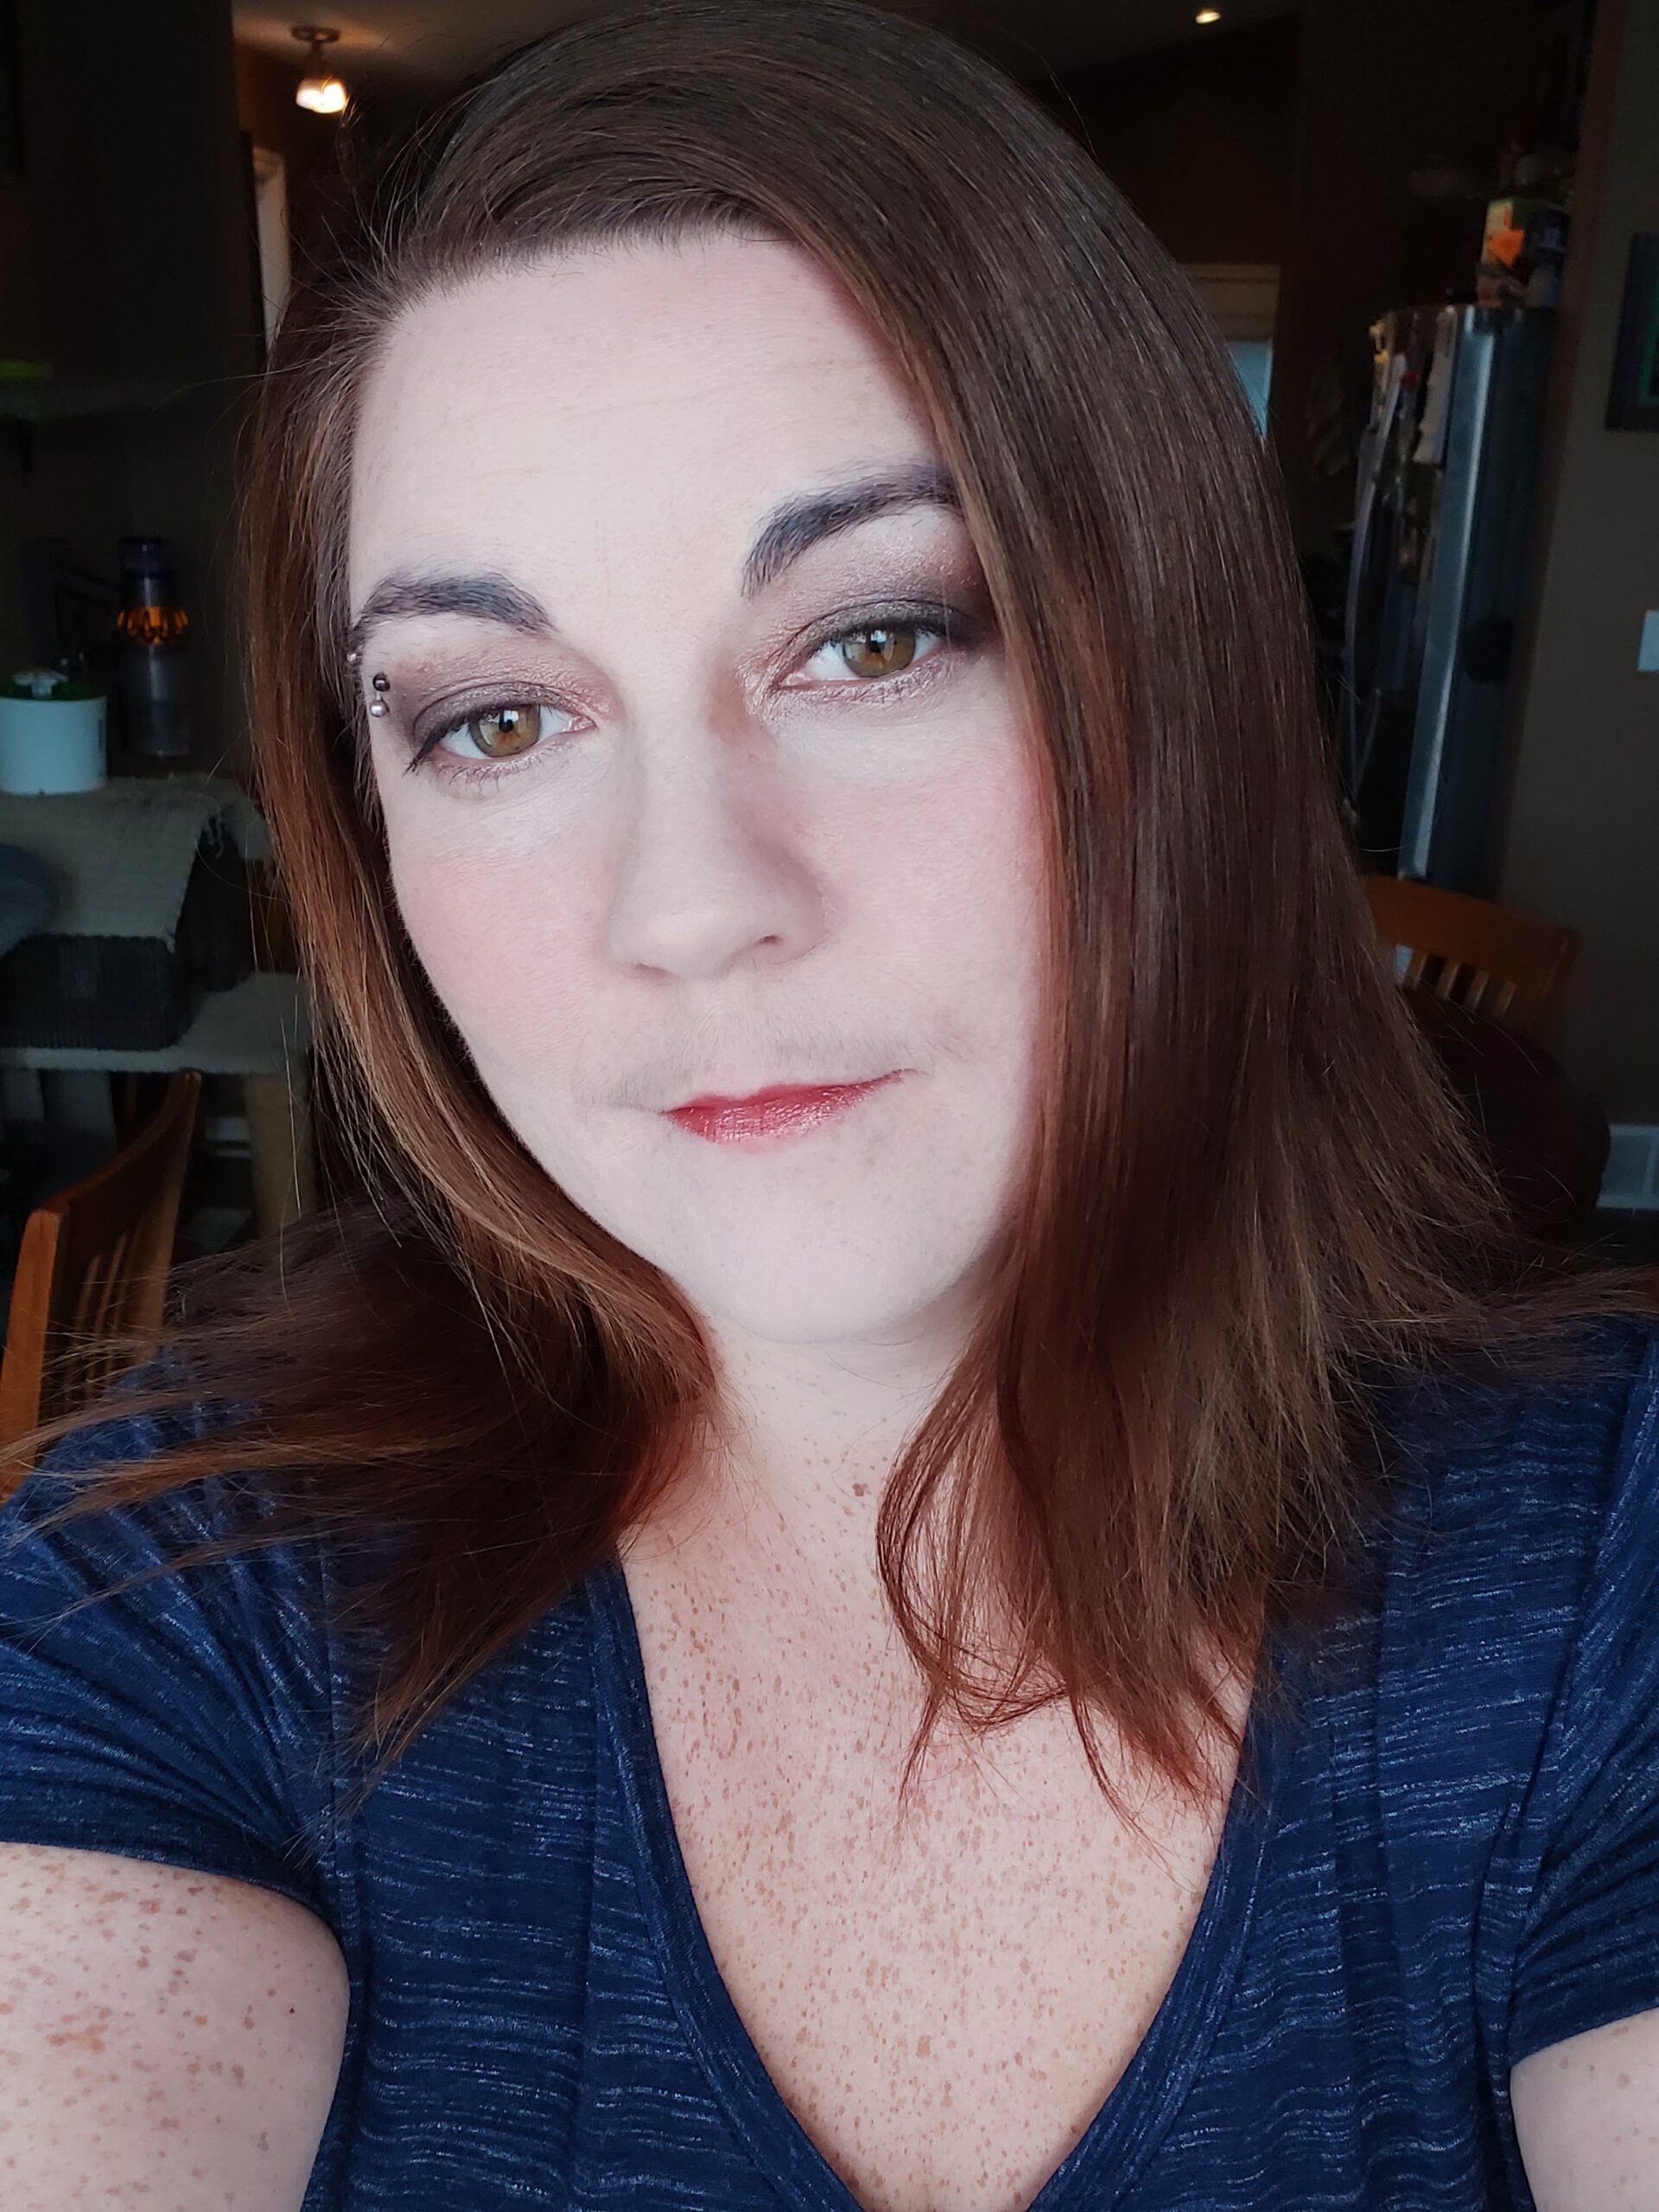
Embarking on the adventure of doing your own makeup for a boudoir shoot? It’s not just doable—it’s a blast! Personally, I revelled in the process, and while both warm and cool looks stole the show, the cool tones won my heart.
However, a word of wisdom: If the motive behind DIY is to save those hard-earned bucks, pause and ponder. If your makeup arsenal is already stocked, you’re golden. But if a shopping spree awaits, especially for items with a one-time cameo, consider the investment. Hiring a makeup artist could be a game-changer. They bring the tools, the skills, and an opportunity for you to bask in pure pampering without worrying about brushes and palettes. These experiences are a gift to yourself, so accept the gift and hire a makeup artist like Nathalie.
Now, a nugget on palette color choices from Nathalie: Brown or hazel eyes? Warm tones like browns, coppers, and golds are your go-to. Blue-eyed beauty? Browns with pops of color are a win. Feel free to match your eyeshadow to your boudoir wardrobe, or keep it neutral with browns and blacks for versatility. 💄💋
There you have it! A beginners tutorial on how to do your own smokey eye boudoir makeup!
Check out how to DIY Style your hair for your boudoir shoot and watch for the next blog on Boudoir foundation, concealer, and more!
Ready to embark on your personal boudoir journey with me? Contact me today to book your exclusive boudoir shoot experience. Let’s create moments of empowerment, confidence, and undeniable beauty together. Your story is waiting to be captured, and I’m here to make it a reality. Get in touch now and let’s start your boudoir adventure! Find my Contact info here.
If you’re not ready to book then you can stay connected with me and get the inside scoop on all things boudoir by joining my mailing list to enjoy exclusive stories, first dibs on bookings, model calls, and fantastic deals from awesome collaborators. It’ll keep you in the loop and make sure you never miss a chance to embrace your inner beauty through my lens.
Just put your info in the form right here!
OR!
Or if you’re seeking a supportive, empowering community of like-minded women, then my private Facebook group – Roses & Scars Badass Babes: Celebrate and Empower You! is the place for you! Join us to discover self-care, empowerment, loads of laughs and the camaraderie of women on their own journeys. Connect with us, engage, and get a real sense of who I am while experiencing the power of female support. Together, we’ll create a space where beauty knows no bounds, and confidence reigns supreme.